Solar Panel Installation Process UK: Step-by-Step Guide
Check Your Eligibility for Boiler Upgrade Scheme (BUS)
Complete your details below to check your eligibility.
Thank you
We've received your details and will be in touch shortly.
Quick Answer: How Does the Solar Panel Installation Process Work?
A UK solar panel installation normally starts with a property assessment and site survey. The installer checks the roof, shading, orientation, available space and electrical system before designing the array. They also determine which DNO connection procedure applies.
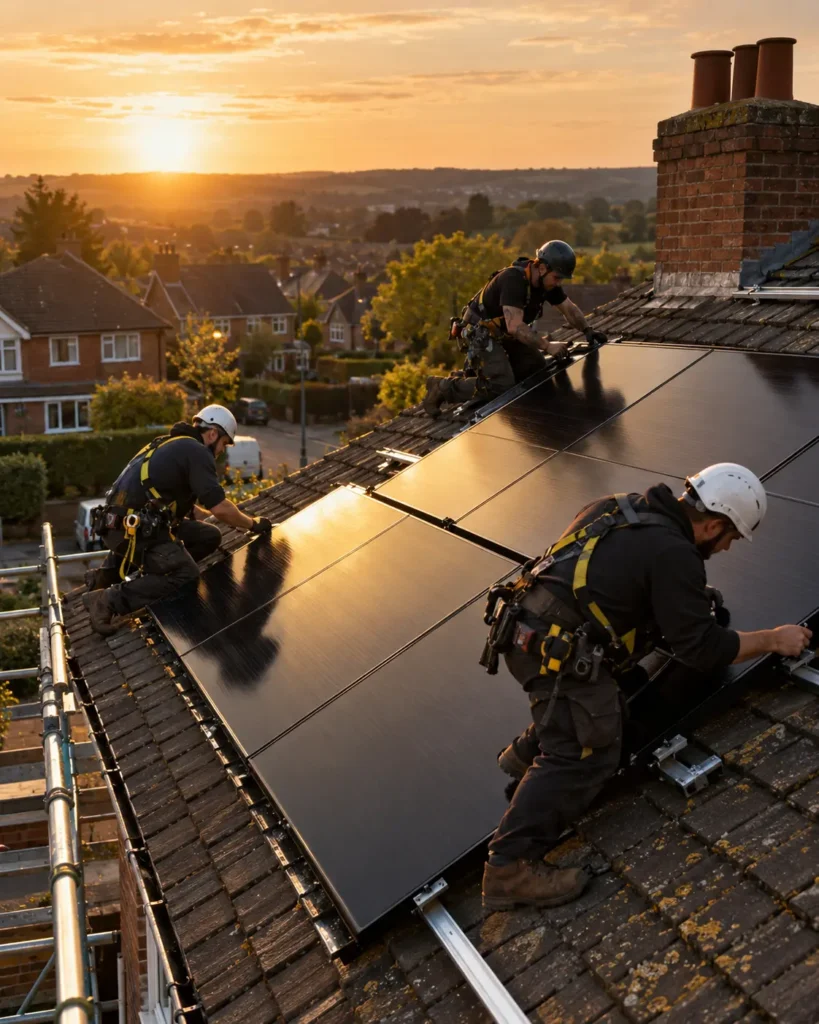
Scaffolding is then erected, roof fixings and mounting rails are installed, and the solar panels are secured in place. DC cables connect the panels to an inverter, which converts the electricity into AC power your home can use. The system is then tested, commissioned and demonstrated to you.
A typical domestic installation takes around one to two days on site, although surveys, grid requirements and scheduling extend the overall project.
Solar Panel Installation Process: What Happens from Survey to Switch-On?
Installing solar panels involves more than fixing modules to a roof. A professional solar panel installation process starts with assessing your property and electricity use, then moves through survey, system design, grid checks, scaffolding, mounting, electrical work, commissioning and handover.
For a typical UK home, the physical installation often takes around one to two days. However, the complete journey takes longer because the installer must assess the roof, design the system, deal with any relevant Distribution Network Operator (DNO) requirements and arrange scaffolding before work begins.
This guide explains what happens at every stage, what installers should check and what documents you should receive when the system is complete.
If you are still comparing your options, you can start with the Get Free Quote home energy comparison service or review what should be included when you compare solar panel installation quotes.
Solar Panel Installation Timeline at a Glance
| Stage | What happens | Typical position |
|---|---|---|
| Initial assessment | Property, electricity use and roof reviewed | Before quotation |
| Site survey | Roof, shading, structure and electrics checked | Before final design |
| Design and grid checks | Layout, inverter, cabling and DNO route confirmed | Before installation |
| Scaffolding | Safe roof access created | Usually shortly before installation |
| Physical installation | Mounts, panels, inverter and cabling fitted | Often 1–2 days |
| Commissioning | Electrical and operational tests completed | End of installation |
| Handover | Documentation, monitoring and warranties supplied | After commissioning |
Energy Saving Trust currently advises that the physical installation of a typical residential system normally takes one to two days, although more complicated properties can take longer.
1. Initial Assessment: Is Your Home Suitable?
The process usually begins before anyone climbs onto the roof.
An installer needs enough information to understand the property, likely system size and your reasons for installing solar. They may ask for recent electricity consumption, roof photographs, your postcode and information about future plans such as a battery, heat pump or electric vehicle.
An initial desktop assessment can provide useful estimates, but it should not replace a proper survey before the final system specification.
Roof orientation matters, although south-facing is not the only workable option. East- and west-facing arrays can also generate useful electricity. Shading from trees, chimneys and neighbouring buildings must also be considered.
2. The Site and Roof Survey
The survey turns an estimate into a property-specific design.
The surveyor should examine the roof dimensions, pitch, covering, condition, orientation and potential shading. They also need to consider access, mounting points and whether the roof can safely support the proposed equipment.
A roof that needs major repairs is normally better dealt with before panels are installed. Removing an array later to repair failing tiles or roof coverings creates extra labour and cost.
If your roof needs attention first, it can therefore make sense to investigate roofing repairs or replacement quotes before committing to the solar installation.
The electrical survey should also check the consumer unit, proposed inverter position, cable routes, meter arrangements and existing electrical equipment.
3. Designing the Solar PV System
Once the survey information is available, the installer can produce the final design.
This should specify the number and model of panels, total system capacity in kilowatt peak (kWp), panel layout, inverter specification and estimated annual generation. If there is significant shading, the designer may consider power optimisers or microinverters.
For context, Energy Saving Trust currently describes an average domestic system as around 4.5kWp, typically using about 20–30m² of roof area. Your ideal size may be smaller or larger.
Generation estimates should reflect your actual roof orientation, pitch, location and shading rather than relying on a best-case figure.
4. Planning Permission and DNO Requirements
Most conventional domestic rooftop solar installations in England fall within permitted development rules, subject to conditions and restrictions. Listed buildings, conservation areas and unusual installations need additional care. Planning rules also differ between UK nations, so confirm the position for your property rather than assuming permission is unnecessary.
The installer must also consider connection to the local electricity distribution network.
Under Energy Networks Association guidance, generation with a combined registered capacity of no more than 16A per phase falls within G98. On a single-phase supply, that corresponds to 3.68kW. Installations above the relevant threshold generally require the G99 process. Batteries and export-limitation arrangements can affect how the connection is assessed.
Your installer should explain which procedure applies and who is responsible for the paperwork.
5. Scaffolding and Site Preparation
For most pitched-roof installations, safe access is created with scaffolding.
Scaffolding may be installed shortly before the solar team arrives. Installers then establish safe working areas, protect access routes and prepare the roof.
Confirm whether scaffolding is included in the quotation. Difficult access, extensions, conservatories or unusually high roofs can change the amount of scaffolding required.
6. Installing Roof Fixings and Mounting Rails
The first permanent components normally fitted are the roof mounting points.
On a tiled roof, installers carefully lift or remove selected tiles to reach the roof structure. Suitable brackets are securely fixed beneath the covering before the tiles are reinstated.
Mounting rails are then attached to these brackets.
The exact method varies with slate, concrete tile, clay tile, metal and flat-roof construction. Whatever system is used, the roof must remain weatherproof.
MCS’s current Solar PV Installation Standard includes requirements covering the design and installation of solar PV systems and associated components.
7. Mounting the Solar Panels
The panels are carried onto the roof and secured to the mounting rails using the specified clamps and fixings.
Installers work to the approved layout rather than simply filling every available space. Clearances, roof obstacles, shading and safe access can affect where individual modules sit.
The panels are electrically connected on the DC side as the array is assembled. Cables should be securely supported and protected rather than resting loosely on the roof.
8. Installing the Inverter and Electrical Equipment
Solar panels produce direct current, or DC. Your home uses alternating current, or AC.
The inverter performs the conversion between the two. Energy Saving Trust describes this as the stage that turns the DC electricity produced by the panels into AC electricity suitable for household appliances.
The inverter needs an appropriate location with suitable ventilation and access. Depending on the system, additional isolation, protection, metering and monitoring equipment will also be fitted.
Your electricity may need to be switched off briefly while the installer completes the AC connection.
9. What If You Are Installing a Battery Too?
A battery can often be installed at the same time as the solar panels.
However, it should form part of the electrical design rather than being treated as an afterthought. The installer needs to consider battery capacity, inverter arrangement, location, protection, monitoring and grid connection requirements.
If you plan to add a battery later, tell the designer now. Choosing compatible equipment at the start may make a future upgrade easier.
The same principle applies if you expect to install an EV charger or other major electrical equipment in future.
10. Testing and Commissioning
The job is not finished when the final panel is attached.
The installer must commission the system and confirm that the electrical equipment and safety devices operate correctly. Monitoring should also be configured so you can see how much electricity the system generates.
Energy Saving Trust advises that installers should test the completed system and show homeowners how it works.
Before the installation team leaves, make sure you know how to identify normal operation, where the relevant isolators are and what to do if the inverter reports a fault.
11. Handover, Certification and Warranties
A professional installation should finish with a proper handover pack.
Depending on the installation, this can include system specifications, electrical documentation, commissioning information, warranties, operating instructions, monitoring details and relevant grid-connection records.
Where an MCS-certified installation has been specified, confirm that the associated documentation and certificate are provided.
Do not rely only on a verbal promise that paperwork will arrive eventually. Ask what documents you will receive and when before signing the contract.
You can also review how Get Free Quote describes its provider-checking approach when comparing companies.
12. Setting Up an Export Tariff
Once your system is generating, you may be able to receive payments for electricity exported to the grid.
In Great Britain, the Smart Export Guarantee requires qualifying electricity suppliers to offer tariffs for eligible small-scale renewable generation. Ofgem confirms that solar PV is included within the scheme.
Export tariff providers normally require suitable metering and evidence that the installation meets their eligibility requirements. Rates and conditions vary between suppliers, so compare them rather than assuming your existing electricity supplier offers the strongest option.
What Should You Check Before Signing Off the Installation?
Before treating the project as complete, check that:
- the final panel layout matches the agreed design
- the inverter and monitoring system are working
- you understand basic shutdown and fault procedures
- roof penetrations and cable routes have been finished neatly
- scaffolding removal has been arranged
- warranties and electrical paperwork are accounted for
- applicable MCS and DNO documentation is being supplied
- you know who to contact for technical support
The important point is that solar installation is a survey, design, electrical and commissioning project, not simply a roofing job.
Get Your Free Air Source Heat Pump Quote
Find the right air source heat pump solution for your home. Tell us a few details and our team will help you explore suitable options at a competitive price.
Quick to complete. No obligation.
Get your quote
Enter your details below and one of our team will get back to you.
Frequently asked questions
Find clear answers to common questions comparing air source and ground source heat pumps, including efficiency, installation and running costs, winter performance, noise, land requirements and borehole depth.
The physical installation of a typical home solar system usually takes around one to two days. Complex roofs, larger systems or additional battery work may take longer.
The installer should assess the property, survey the roof and electrical system, design the array and deal with relevant planning and DNO requirements.
Yes. Roof condition, dimensions, pitch, shading, access and structural suitability can all affect the design.
Most conventional domestic rooftop systems do not require a planning application, but restrictions apply. Listed properties, protected locations and unusual installations require additional checks. Rules vary across the UK.
Your Distribution Network Operator manages the local electricity network that connects your property to the grid.
G98 covers qualifying small generators up to 16A per phase. On single-phase supplies this corresponds to 3.68kW. Larger generating systems generally fall under G99 requirements.
Not necessarily, because the relevant connection assessment concerns the generating equipment's AC capacity and configuration rather than simply the panel array's quoted DC kWp. The installer should determine the correct procedure.
Most pitched-roof domestic installations use scaffolding to provide safe access. Confirm whether it is included in your quotation.
Mounting methods depend on the roof construction. On many tiled roofs, brackets are secured to the underlying structure while the weatherproof roof covering is carefully reinstated.
Location depends on the design. It needs suitable access, ventilation and an appropriate cable route to both the array and household electrical system.
Usually only briefly while the electrical connection is completed and tested.
Yes. Solar PV and battery storage can be designed together, which can simplify equipment compatibility and electrical planning.
Often, yes. However, tell the installer about future battery plans because inverter choice, space, cabling and grid arrangements can influence how simple the upgrade will be.
Expect relevant electrical certification, product and workmanship warranty information, operating instructions, monitoring details and applicable MCS and DNO documentation.
You can normally investigate an export tariff once the system has been commissioned and you have the documentation and metering required by the chosen SEG supplier.
Conclusion
The solar panel installation process starts long before the installers arrive with the panels.
A good project moves logically from property assessment and site survey through system design, planning and grid checks, mounting, electrical installation, commissioning and documented handover. The roof work itself may take only one or two days, but decisions made during the survey and design stages influence how suitable the finished system is for your home.
Compare quotations on the complete specification rather than price alone. Look at the proposed system size, generation assumptions, equipment, scaffolding, DNO responsibilities, warranties, certification and aftercare.
When you are ready to discuss your property, you can contact Get Free Quote about your solar project and compare the scope of suitable quotations.