Solar Panel Installation Step by Step | UK Guide 2026
Check Your Eligibility for Boiler Upgrade Scheme (BUS)
Complete your details below to check your eligibility.
Thank you
We've received your details and will be in touch shortly.
Quick answer: how are solar panels installed?
A professional rooftop solar PV installation starts with a survey to check roof condition, orientation, shading, electrics and cable routes. The installer designs the array and confirms planning, Building Regulations and Distribution Network Operator requirements where relevant.
Scaffolding is erected, roof fixings and mounting rails are installed, then the panels are clamped in place. DC cables connect the panels to an inverter, which converts solar-generated direct current into AC electricity for the home. The inverter connects to the household electrical installation with appropriate protection.
Finally, the installer tests and commissions the system, completes the applicable network paperwork and hands over operating information, certificates and warranties.
Solar Panel Installation Step by Step: From Survey to Switch-On
A solar installation involves more than fixing panels to a roof. A good project starts with a survey and system design, then moves through permissions and grid checks, scaffolding, roof mounting, electrical work, commissioning and handover.
According to Energy Saving Trust’s step-by-step solar installation guide, a typical rooftop solar installation usually takes one to two days, although complex roofs, batteries or electrical upgrades can take longer. The full journey from quote to completed paperwork often takes longer because design and grid-connection steps happen before and after the installation itself.
This guide explains solar panel installation step by step, so you know what should happen on the roof, inside your home and before the system is signed off.
If you are at the research stage, Get Free Quote’s home energy comparison service can help you understand the wider process. You can also compare solar panel installation quotes based on system size, equipment, warranties, scaffolding and electrical work.
Solar panel installation process at a glance
| Stage | What happens | Usually handled by |
|---|---|---|
| Survey and design | Roof, shading, electrics and energy use are assessed | Installer/designer |
| Permissions and DNO | Planning and grid route are checked | Installer/homeowner |
| Roof installation | Scaffolding, fixings, rails and panels are fitted | Installation team |
| Electrical work | DC cabling, inverter and AC connection are completed | Electrician |
| Commissioning | Electrical and operational checks are completed | Installer/electrician |
| Handover | Certificates, warranties and guidance are supplied | Installer |
1. Survey the property and roof
The first technical step should be a property survey, not simply selecting a package by panel count.
The installer should assess roof orientation, pitch, usable area, shading, chimneys, rooflights and access. They should also check whether the roof covering and structure appear suitable.
If your roof is damaged or approaching the end of its useful life, repairing it before the solar installation can avoid the cost of removing panels later. Homeowners who already know roof work is needed can compare the scope of that work through Get Free Quote’s roofing quote service.
Inside the property, the survey should consider the consumer unit, meter position, earthing arrangements and a practical route for cables between the roof, inverter and electrical supply.
Energy use matters too. A sensible design considers roof space, expected generation, daytime electricity demand and whether you may later add battery storage or an EV charger.
2. Design the solar PV system
After the survey, the installer specifies the number and model of panels, total array capacity in kilowatt-peak (kWp), inverter type, panel layout and estimated annual generation.
A south-facing roof normally maximises annual production. However, east- and west-facing roofs can still generate useful amounts of electricity. Energy Saving Trust estimates that east- or west-facing systems tend to generate around 15–20% less electricity than an equivalent directly south-facing system.
Shading from trees, chimneys and nearby buildings should also be assessed. In some situations, optimisers or microinverters can reduce the effect of partial shading.
If a battery is included, check its usable capacity, power rating, warranty and operating mode. Also check whether backup during a power cut is actually included. A standard solar-and-battery installation does not automatically keep the house powered when the grid fails.
3. Confirm planning, Building Regulations and grid requirements
Many domestic rooftop systems do not need a full planning application, but rules vary across the UK and depend on the property.
In England, rooftop solar can often qualify as permitted development subject to conditions. For example, permitted-development rules restrict how far equipment can project beyond the roof plane and generally prevent panels from extending above the highest part of the roof. Listed buildings and some properties in designated areas require additional consideration. Check the current GOV.UK permitted-development guidance or your local planning authority before proceeding.
The installer should also explain who is responsible for Building Regulations compliance and the grid connection.
Energy Networks Association now operates ENA Connect Direct for domestic low-carbon technology connection applications. Smaller generation installations may follow the G98 route, while larger or more complex systems can require G99 approval. The applicable process should be established during design rather than after the installation.
4. Erect scaffolding and install the roof mounting system
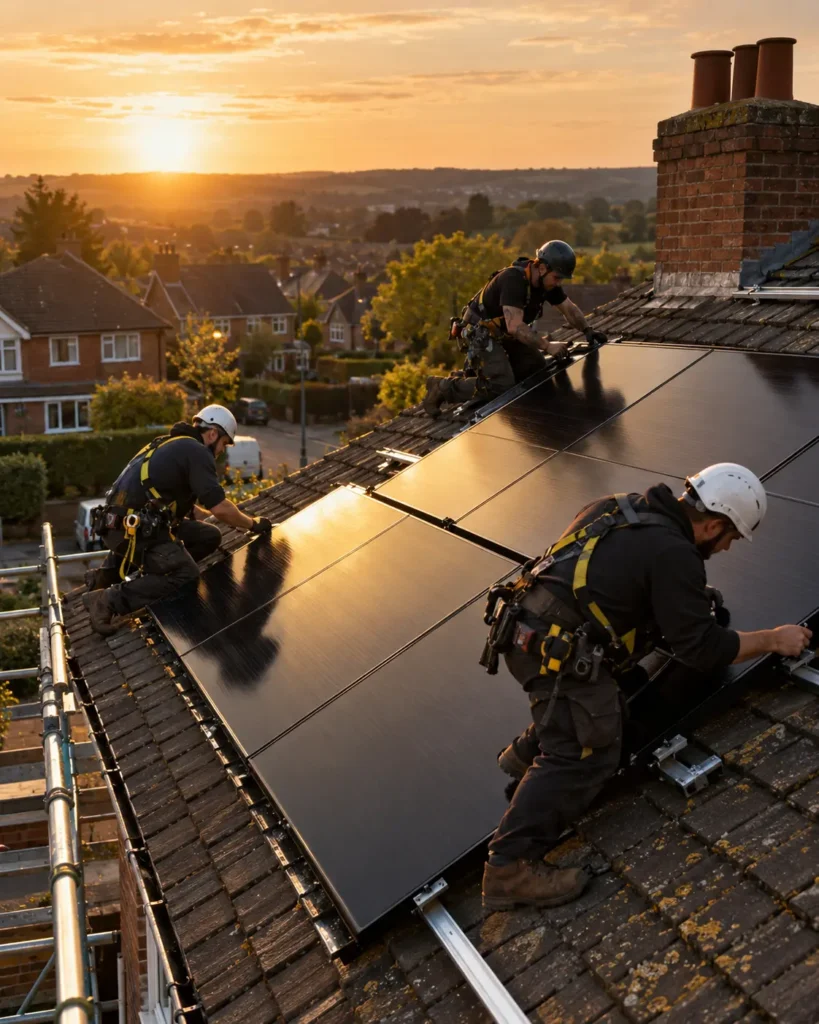
For a typical pitched-roof installation, scaffolding normally goes up before solar work starts. It provides safe roof access and a working platform for moving equipment.
Installers then attach the mounting system to the roof structure.
On many tiled roofs, selected tiles are lifted so roof hooks or brackets can be secured to rafters or another suitable structural point. Tiles are replaced around the brackets and the installation must remain weatherproof.
Metal mounting rails are then fixed to the brackets and aligned. These rails form the frame that supports the solar modules.
Slate, standing-seam metal and flat roofs need different mounting arrangements. The system should therefore suit the actual roof rather than use a generic fixing method.
5. Fit and wire the solar panels
Once the mounting rails are ready, installers lift the panels to roof level and clamp them securely into place.
The panels are then electrically connected on the DC side.
With a conventional string inverter, several panels are usually connected together into one or more strings. Those strings feed the inverter. With microinverters, DC-to-AC conversion takes place at or close to individual panels.
Cables should be securely supported and protected from abrasion. Connectors must be compatible and correctly assembled because poor DC connections can create electrical faults and overheating.
The completed array should follow the agreed design unless a site condition requires a properly considered change.
6. Install the inverter and optional battery
Solar panels generate direct current, or DC. Household appliances use alternating current, or AC.
The inverter performs that conversion.
Depending on the equipment and property, the inverter may be installed in a garage, utility area, loft or another appropriate position. Manufacturer requirements, temperature, cable lengths and maintenance access all influence the final location.
If battery storage forms part of the project, installers will also fit the battery and relevant control equipment. They should explain when the battery charges, when it discharges and how it interacts with solar generation and your electricity tariff.
Monitoring equipment, export limitation and solar-aware EV charging controls may also be fitted at this point.
7. Connect the solar system to the consumer unit
A suitably qualified electrician connects the inverter’s AC output to the household electrical installation using the required protective devices, isolators and cables.
The exact arrangement varies between homes.
Older or unsuitable electrical equipment may need additional work before the solar installation can be connected safely. This is one reason quotations should clearly distinguish the standard installation from possible consumer-unit or cabling upgrades.
Electricity may need to be switched off briefly while the final connection is completed.
Once operational, solar generation can supply electricity being used in the home. Surplus electricity can then be stored, diverted to another load or exported to the grid, depending on the system design.
8. Test and commission the system
Panels being physically attached to the roof does not mean the installation is complete.
The installer should test the DC and AC sides of the system, check protection and inverter operation and confirm that monitoring works correctly.
You should be shown how to recognise normal operation, view generation data and isolate the system if necessary.
Ask what normal performance should look like and who to contact if the inverter displays a warning or stops producing electricity.
A functioning monitoring app is useful, but it is not a substitute for proper electrical testing and commissioning.
9. Complete registration, handover and export setup
After commissioning, the installer should complete the applicable network paperwork and provide the documents relevant to your installation.
Keep your installation certificate where applicable, equipment details, warranties, estimated performance information and operating and maintenance instructions with your property records. Energy Saving Trust also advises that installers explain maintenance checks and important inverter fault signals.
If you want to receive payment for eligible surplus electricity in Great Britain, you can apply for a Smart Export Guarantee tariff through Ofgem’s listed suppliers.
Ofgem confirms that qualifying SEG licensees pay eligible generators for exported renewable electricity. Your export supplier does not have to be the same company that supplies your household electricity.
How long does solar panel installation take?
A straightforward domestic installation commonly takes one to two days on site, according to Energy Saving Trust. Scaffolding may be erected earlier and removed later.
The full project takes longer because survey, design, equipment scheduling, DNO requirements, installation and certification are separate stages.
Battery installation, electrical upgrades, difficult roof access or grid constraints can extend the programme.
When comparing quotes, ask for two timescales: the expected time on site and the expected period from signing the contract to completed handover.
How much does solar panel installation cost?
Energy Saving Trust currently gives around £7,600 as the typical cost of a home solar panel system. Actual prices vary with system size, roof access, scaffolding, equipment, electrical work and battery storage.
Treat national averages as guides rather than quotations.
A useful quote should identify the proposed system size, estimated annual generation, exact equipment, scaffolding and access costs, electrical work, certification, warranties and exclusions.
What should you check before signing off the installation?
Before the team leaves, confirm that the system is generating, monitoring works, labels and isolators are in place and you understand the shutdown procedure.
You should also confirm who handles the DNO paperwork, when outstanding certificates will arrive, what each warranty covers and how aftercare works.
It is sensible to photograph the completed array, inverter, meters, battery if fitted and any changes to your consumer unit.
Get Your Free Air Source Heat Pump Quote
Find the right air source heat pump solution for your home. Tell us a few details and our team will help you explore suitable options at a competitive price.
Quick to complete. No obligation.
Get your quote
Enter your details below and one of our team will get back to you.
Frequently asked questions
Find clear answers to common questions comparing air source and ground source heat pumps, including efficiency, installation and running costs, winter performance, noise, land requirements and borehole depth.
A typical domestic rooftop installation normally takes one to two days. Complicated roofs, batteries or electrical upgrades can make the installation longer.
Usually not for a standard domestic rooftop installation, but there are exceptions. Listed buildings, designated areas and installations outside permitted-development limits may need consent. Rules also vary between UK nations.
For most pitched-roof installations, installers use scaffolding to provide safe access and a working platform. Energy Saving Trust includes scaffolding as a normal part of the installation sequence.
Yes. A mounting system can position panels at an appropriate angle, but roof loading, wind exposure and spacing require careful assessment. Energy Saving Trust confirms that flat-roof installations are possible.
Yes. Energy Saving Trust estimates east- or west-facing systems typically generate around 15–20% less electricity than an equivalent south-facing array.
Yes. Solar PV generates electricity from daylight rather than requiring uninterrupted direct sunshine, although output generally falls under cloudier conditions.
Yes, grid-connected solar needs the appropriate Distribution Network Operator process. The exact application or notification route depends on the installation, and installers normally handle it.
They are Engineering Recommendation routes governing how electricity generation connects to distribution networks. G98 covers qualifying smaller microgeneration installations, while G99 applies to generation outside the G98 criteria. Your installer should identify the correct route.
MCS is the widely used UK certification scheme for small-scale renewable installations. For Smart Export Guarantee applications involving solar PV up to 50kW, Ofgem requires suitable installation and installer certification; an MCS certificate or recognised equivalent can demonstrate this.
DIY rooftop solar is not recommended. Even where someone physically mounts panels themselves, electrical connection, grid requirements, safety and certification still need qualified professional involvement. Energy Saving Trust recommends professional installation.
Not necessarily. A battery may increase the amount of solar electricity you use yourself, but its value depends on your electricity consumption, tariffs, capacity, efficiency and cost.
Normally, no. Standard grid-connected solar systems shut down during an outage for safety. Backup operation requires additional equipment and a system specifically designed for it.
A correctly designed and installed system should not damage a sound roof. Roof condition and suitable fixing methods should be checked before installation.
Not always. The installer should inspect the existing electrical installation. Older or unsuitable equipment may require upgrading before the solar system can be safely connected.
Eligible households in Great Britain can receive payments through Smart Export Guarantee tariffs. Rates and contractual terms vary by supplier.
Yes. Ofgem says your SEG supplier does not have to be the same company that supplies your electricity.
No. Plug-in solar is now a separate option in Great Britain following changes introduced on 27 August 2026. Energy Saving Trust describes plug-in systems of up to 800W, while this guide covers professionally installed rooftop solar PV systems.
Conclusion
Solar panel installation is relatively straightforward when each stage happens in the correct order.
A well-managed project begins with a site-specific survey and design, confirms permissions and network requirements before work starts, uses a mounting system suited to the roof, completes the electrical installation correctly and finishes with testing, paperwork and a proper handover.
When comparing installers, look beyond the headline price. Compare the proposed equipment, generation assumptions, roof and electrical scope, DNO responsibility, warranties and aftercare.
Get Free Quote describes its role as helping homeowners compare scope, price, provider information, warranties, exclusions and timescales rather than acting as the installer itself. You can read more about how Get Free Quote compares providers before deciding which quotation suits your project.